Tuesday, 24 September 2013

Washi Tape

My washi tape has arrived and I cannot wait to use it! I got it from this little shop over at Etsy and I'm really happy with it now it has arrived!


I plan to use it to jazz up my up cycled biscuit tin and cover them not quite straight lines in the process. But which one should I use?! The decisions, so to help me out I decided to buy some plain cards perfect for making your own and use the washi tape in my designs.


Complete novice I know!


To make this card I used 4 strips of washi tape, some plywood letters which cost 99p for the full alphabet and then some paper flowers from Dove Craft, I got a pack of various colours and sizes for 99p and plain cards which you can find in most craft shops, and a good old tube of PVA glue! 

I still think it's great that you can achieve a personalised result so easily and on a budget (even if my attempt has 'beginner' stamped all over it).


My love affair with washi tape has officially begun.

Muchos x

Tuesday, 17 September 2013

Upcycled Biscuit Tin

So, after the framed pin board project here. We had rather a lot of paint left. And I couldn't resist painting something else.


I'm always looking to reuse items we already have to create storage to help keep us organised. On my hunt for a paintable object I came across this old biscuit tin, whilst I don't hate the pattern or the colours, I am very colour scheme focused and there will be no room in our new house that will incorporate that many colours, so I got paintbrush happy.


This was solely my project so one coat of undercoat was all that was needed.


And then it got the white gloss treatment, and it was perfectly covered, lovely and glossy white and a tad boring. The main colour for our new dining room is going to be green, and we plan to carry this through to the kitchen. I want the green to be light and fresh and natural and will also be throwing in a few splashes of yellow. So a yellow stripe was in order for my rather boring glossy white tin.


I put masking tape around the top and bottom of the tin leaving a stripe uncovered across the middle. I tried to be very careful and keep the tape straight..I did my best.


Then out came this delicious pot of 'Taxi' yellow paint which I have had for quite some time now.


I decided to use a sponge to apply the paint to give the stripe a different texture to the rest of the tin.

Stripe painted I loved the speckled effect against the smooth gloss. But here is where I made my mistake, I left the masking tape on during the drying stage, instead of removing it straight away, so I did get some bleed through :(


But from afar you can't tell!


An excellent storage solution for all our tall utensils, and we have many, shown is just a small selection, I don't even know what half of the others do!


So my paint craving hands were satisfied, I'm not sure that this will be our forever storage tin for the kitchen, it was a very rush job after all, but I can already see a future for this tin holding various knitting needles, crochet hooks, maybe a few craft scissors...

And as for the bleed through, well I have a solution! I have recently ordered some Washi tape from the knickknackshop on Etsy, here. I got various tapes with yellow and green patterns - they will cover up the bleed through no problemo! I will update once they have arrived and been installed on my tin.


Friday, 13 September 2013

Waiting for a craft room...

So for the past year we have been renting a lovely little terraced house, it's very open plan and we spend a lot of time downstairs. It has two bedrooms and the second bedroom is a bit of a mixture of spare room, dressing room and home office.

The intention was always to make it my craft room (well that was my intention anyway) but over the course of the year I realised I didn't like shutting myself in a room away from all the activity in the house and gradually those craft supplies started coming downstairs.

Where they get a lot of use.. resulting in craft chaos.


In the new house I already know where my craft space will be and have already planned out the space to fit all my supplies nice and snug - I can't wait to get started on that and share my ideas. But for now, my craft stuff is staying put, but it could sure do with some organising.

So I shopped my home and came up with these. A shoe box, a shoe box lid and a shallow wicker basket.


My main problem is that I have several projects on the go at any one time and the supplies I need for each project I try to keep separate which at best means an ugly plastic bag or sometimes they just get thrown in the mix.


So using my new items from around the house I got rid of those plastic bags and created separate storage for my individual projects.

So much better!


It's only a temporary fix and it's not perfect or beautiful but for now it will do the trick!

Muchos x

Fabric Covered Framed Pin Board

With our move to the new house fast approaching I have been on the lookout for any freebies or cheap furniture I can find. And one day it paid off, I came across the most glorious framed cork board, left in a pile for the skip outside an office building in town. After checking it definitely was for the skip I rang my 'man with a van' (who from here on in will be known as 'J' - mysterious) and we hastily smuggled it home before they could change their mind!


 Okay, so it didn't look to great to start off with, but I could see the finished product already in my mind and it was beautiful. As soon as it was home I wasted no time in separating the cork from the frame, I was so quick that I even forgot to take a photo, but you can see how much glue had been used to keep it in place...


Now I was ready. The next day me and J made a trip to our local Wilkinson's for some cheap supplies, sandpaper, masking tape, paintbrushes, undercoat and white gloss (yes we really did have none of those things! I am sure that will soon change once we become 'home owners') For less than £15 we had the lot and the real fun could start.

My first job was to sand down the frame to get rid as much of the varnish as possible, it took some doing and I probably should have kept at it a while longer but I hate sanding and my impatience won out.


Once I was happy enough with how much I had sanded we got to work and painted the frame with it's first layer of undercoat, yes I said we, it seemed J couldn't resist all the DIY that was going on and couldn't help but get involved - much to my delight!


Each coat had to be left for 16 - 20 hours to dry. And on J's instruction we had to give it three yes three coats of undercoat before he would let the gloss go on!


Finally, four days later the third coat was dry and the glossing began. This too took a day to dry, but it was worth it...


Whilst waiting for the paint to dry, we decided not to sit and watch it dry but to go and get our fabric to cover the cork. This was perhaps the most stressful part of the project. As we haven't moved into our new home yet, we also haven't decorated, so we had to decide once and for all the colour scheme for our dining room, as that's where we plan to hang the pin board. We easily decided on green as our main colour accent for the room, now it was finding the shade and pattern and that's when the tension started. My mind wanted vintage florals, his mind wanted masculine stripes and a simple design. We'd all about given up when we found it...


Polka dot perfection and a delicious shade of green that's fresh and light without being too overpowering. Love. And at £11.99 a metre it was a bargain, as the fabric was 140 cm wide we only needed 1 metre for this project (our board is 120 x 92 cm) but I snuck in an extra metre for luck (I sense cushions!)

Once home the fabric needed ironing. Lots.

The ironing session from hell itself...

There were still faint creases when we decided to give up (9 irons later) and just go for it. Impatience won out again. Luckily with no adverse results!

We did prep the cork by covering the sides with masking tape, purely because they had suffered some damage when I removed them from the frame due to the glue that had held them in place. I'm not sure it was necessary but we did it anyway.


The boyfriend proved incredibly useful once more and produced a staple gun I had no idea he had (it's meant for wiring but it worked a charm) so we got staple happy. This was a two man job so there's no pictures of the process but what we did was to lay out the fabric face down and placed the cork board on top. We made sure the fabric was straight (no one wants wonky polka dots) and once we were 100% happy we folded over the top and stapled all along, starting in the middle and working out. We then pulled the bottom tight (to get rid of them creases) and keep the fabric snug to the board, and stapled again. We did this again for the sides. We had our fabric covered cork! And it looked perfect in its new glossy white frame.


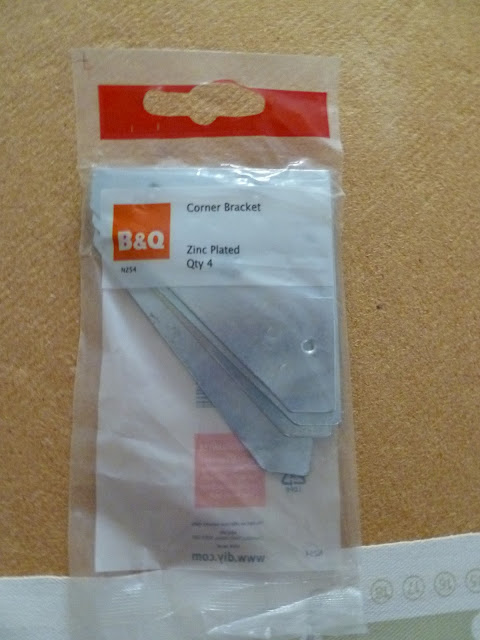
All that was left was to secure the cork to the frame. I didn't want to glue it again as I wanted to be able to easily remove the cork should we need to. So a trip to B&Q later and we returned with these.


We got 8, one for each corner and one for in the middle of each side.


Oh there's 'J's' hand!

The boyfriend proved useful yet again and out came the power tools.


And the big reveal...

I used the paint tin to show the scale of our mammoth pinboard!


Ta Da! We are so happy with how it has turned out and can't wait to move in and get it up on the wall. It's going to make a lovely feature for our new dining room and will be such a great place to display all our reminders, photos, tickets, invites, postcards and whatever else we like. I just have to work up the courage to put pins in the beautiful thing!

I can't wait to share a picture of it in it's new home!

Muchos x

Thursday, 12 September 2013

Welcome

Hello and welcome to the first ever blog post!

Muchos Home is set to be filled with all sorts of fun home projects ranging from cleaning, organisation, crafts, upcycling and will also detail every aspect of our fast approaching move to our first home.

I would love for you to come on that journey with us through following our blog and hopefully along the way you will also be inspired to try out some of our projects for yourself!

Thanks for visiting and please come back soon, you never know what you could find!

Muchos x